https://www.mssqltips.com/sqlservertip/5463/backup-and-restore-database-tasks-using-sql-operations-studio/?utm_source=dailynewsletter&utm_medium=email&utm_content=headline&utm_campaign=20180424


Problem
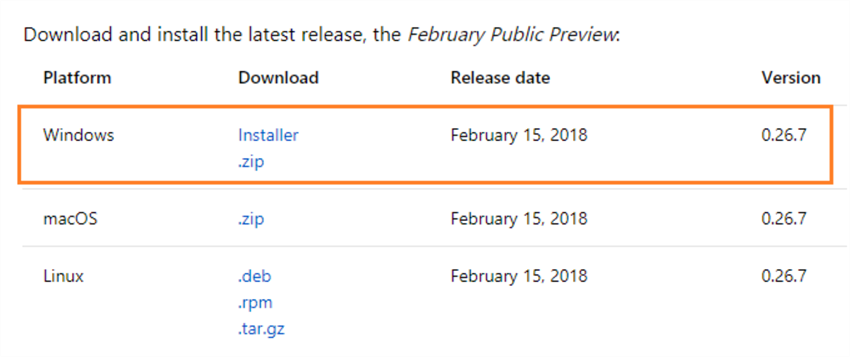
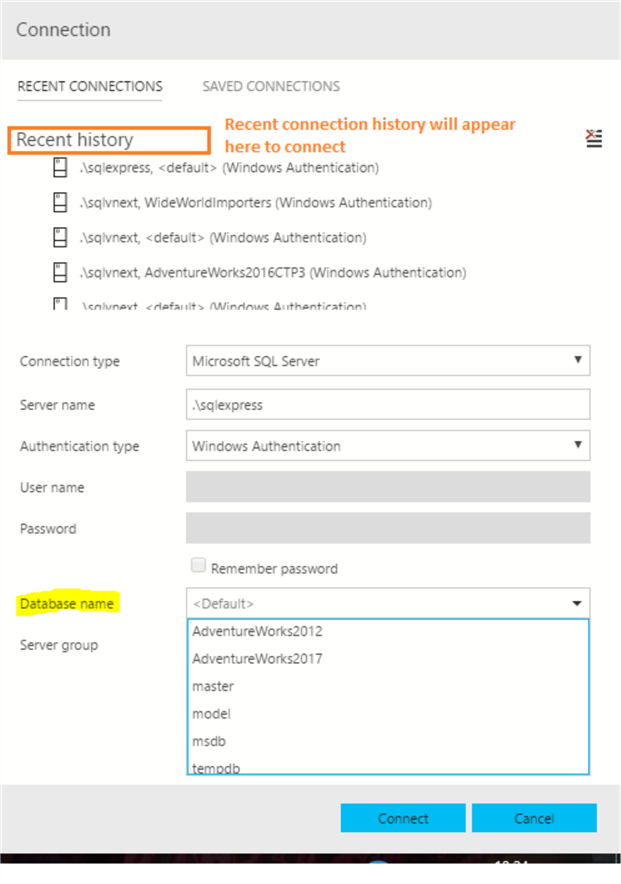
In my previous tips SQL Operations Studio Installation And Overview and SQL Operations Studio - Query Editor and Source Control, we explored how to connect to SQL Server using SQL Operation Studio, an overview of the tool, running queries with query editor enhancements, multiple configuration options, etc.
In this tip, we will see how to perform commonly used tasks such as database backups and restores along with advanced configuration options.
Solution
As explored earlier, SQL Operation Studio is lightweight, cross-platform Open-Source tool for database administrators, developers, development, and operations.
Some of the important features of SQL Operations Studio are:
- Cross-platform database management tool for Windows, macOS, and Linux.
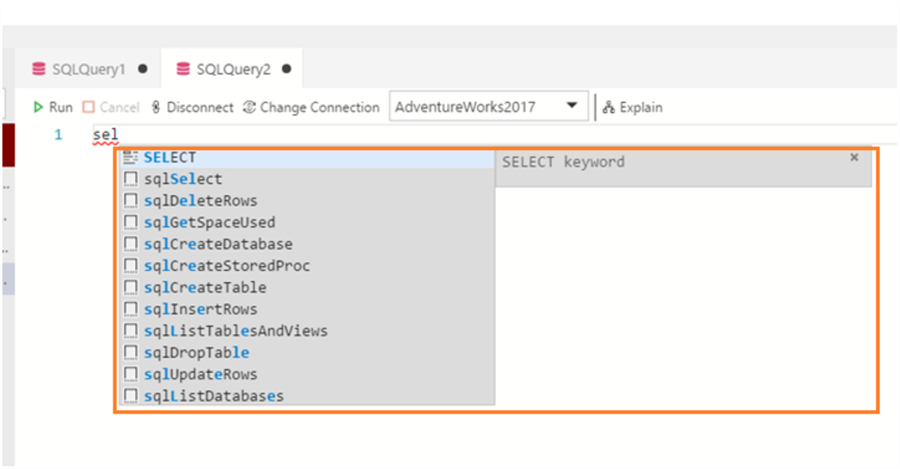
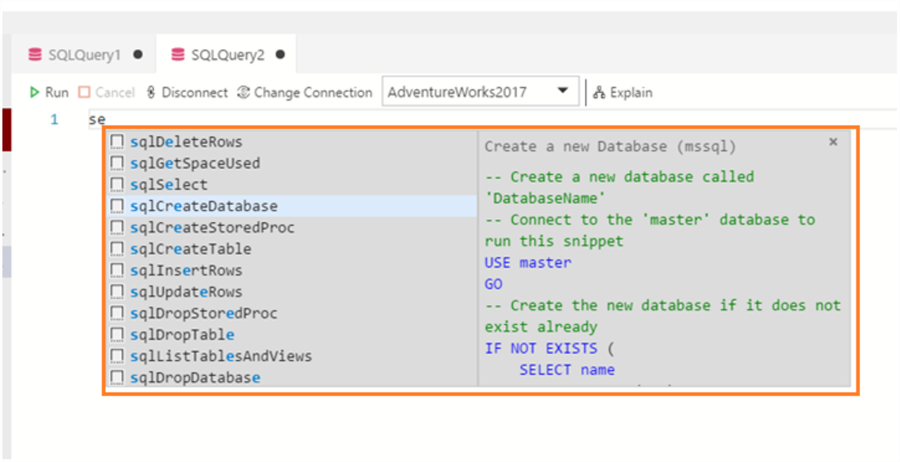
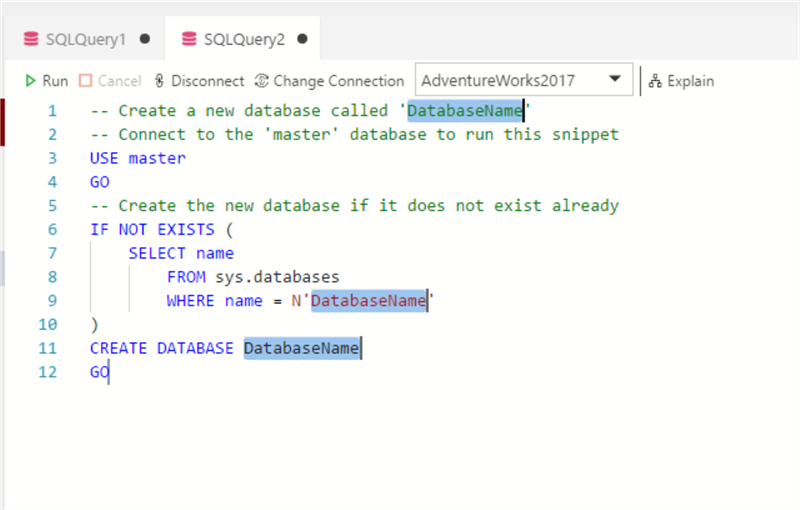
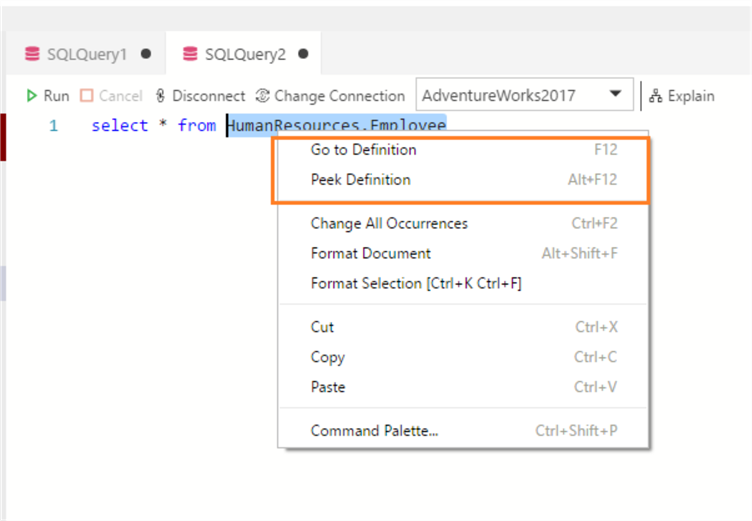
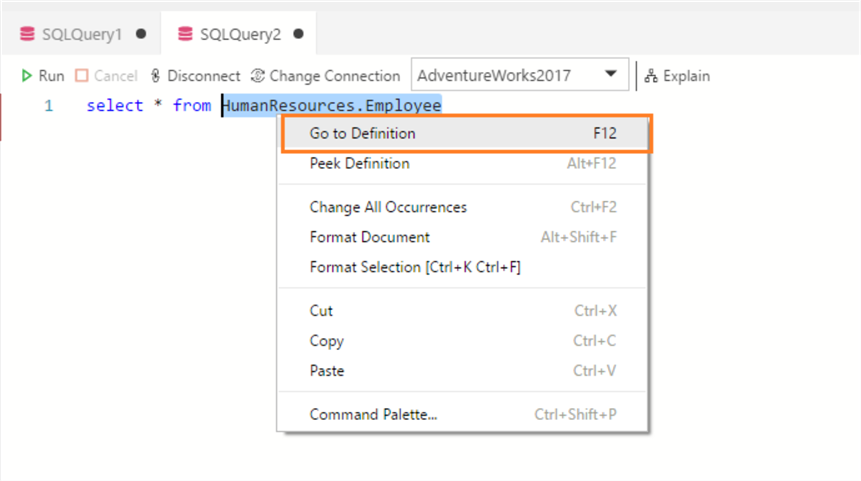
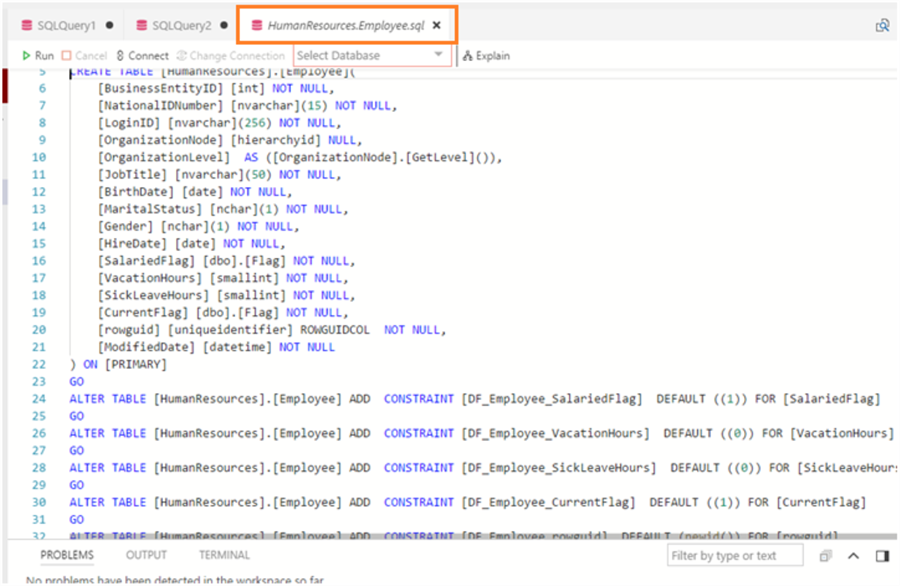
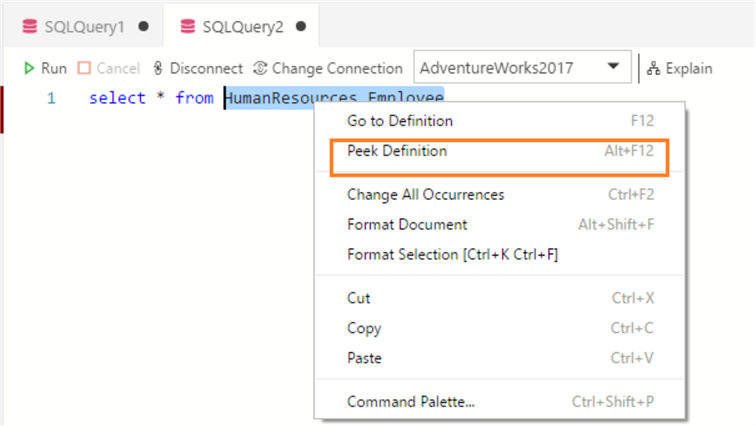
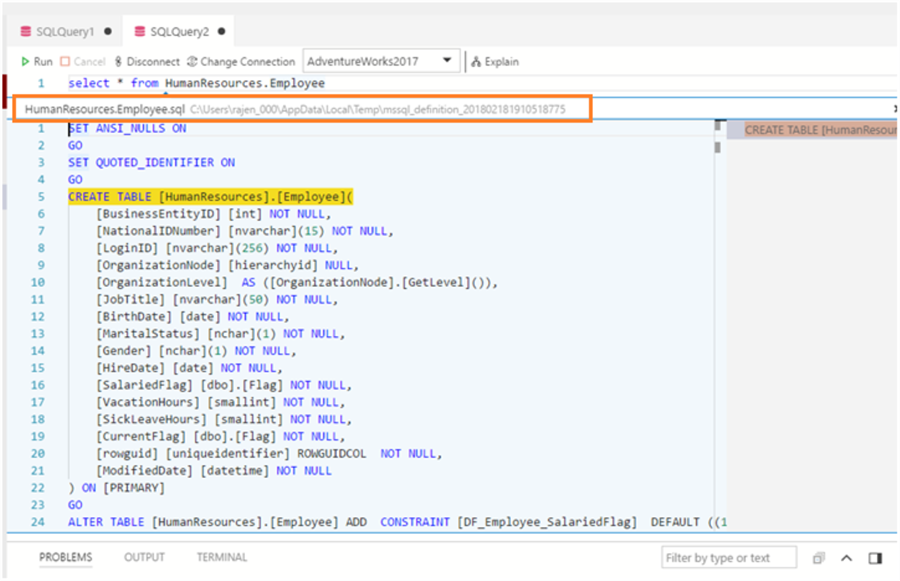
- Query Editor with advanced coding features like peek definition, auto suggestions, error diagnostics, formatting, etc.
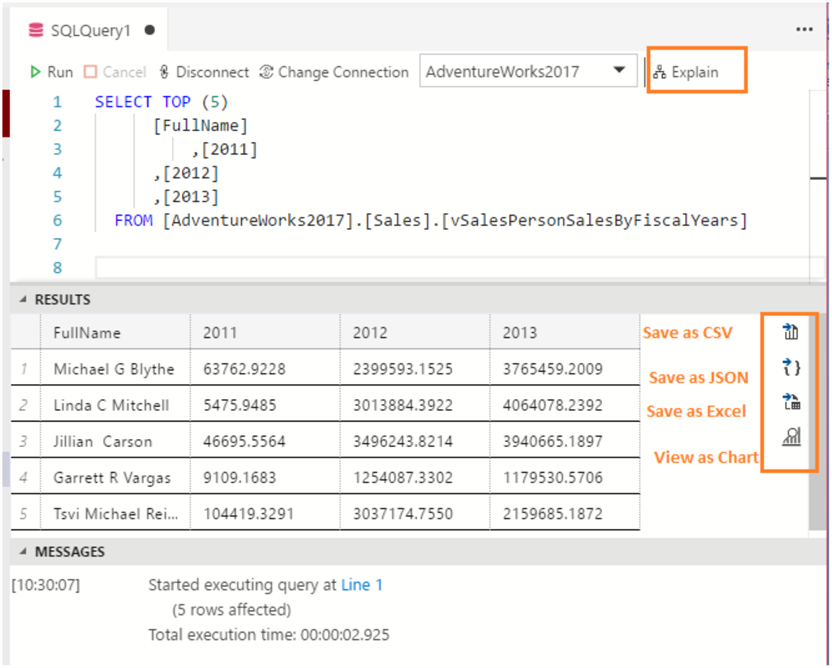
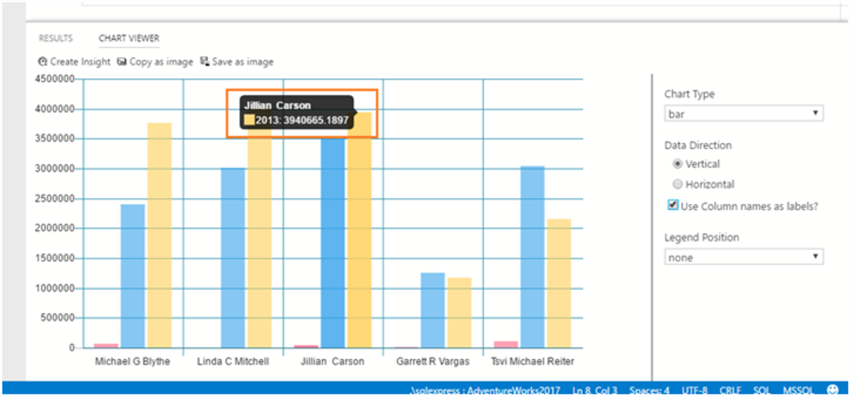
- Query Results Viewer with various formats of result sets such as JSON\CSV\Excel.
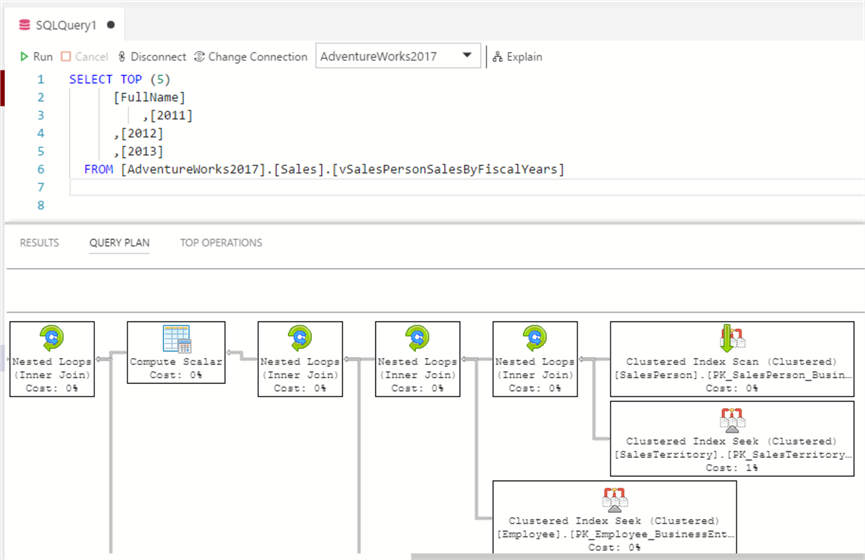
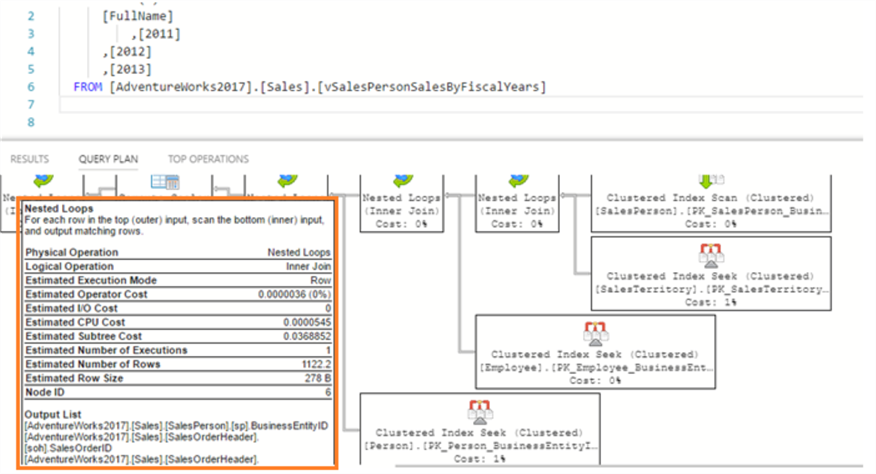
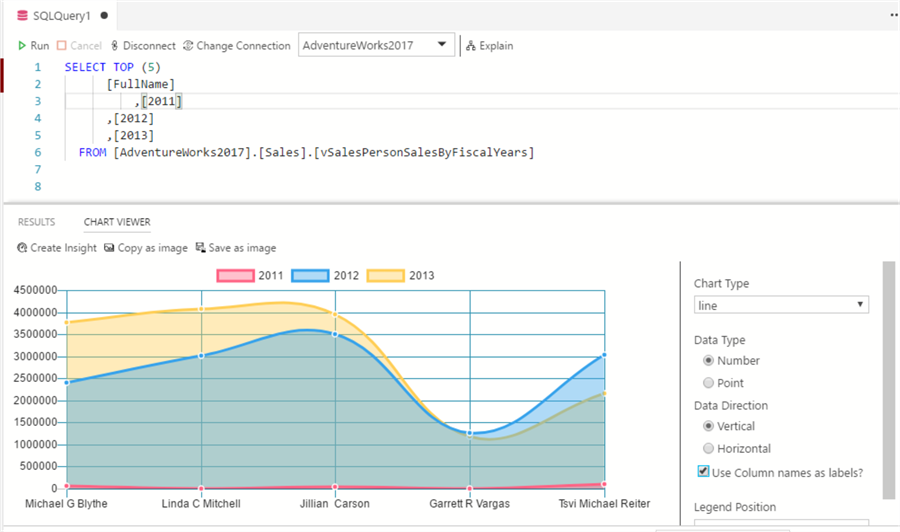
- Nice graphical informative Query execution plan
- SQL Server Connection Management Server Groups in various color codes to differentiate the environment.
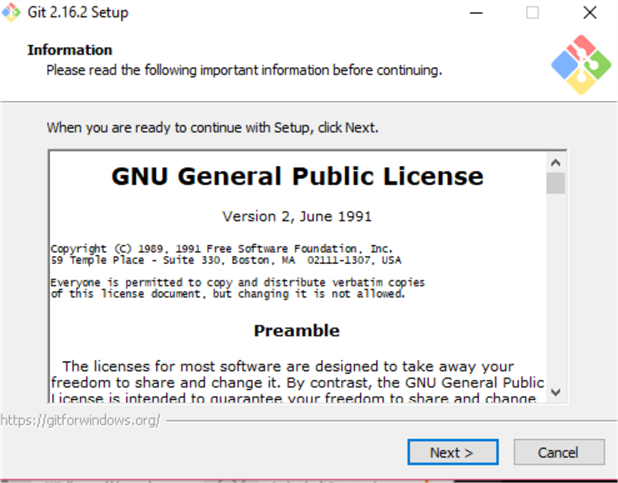
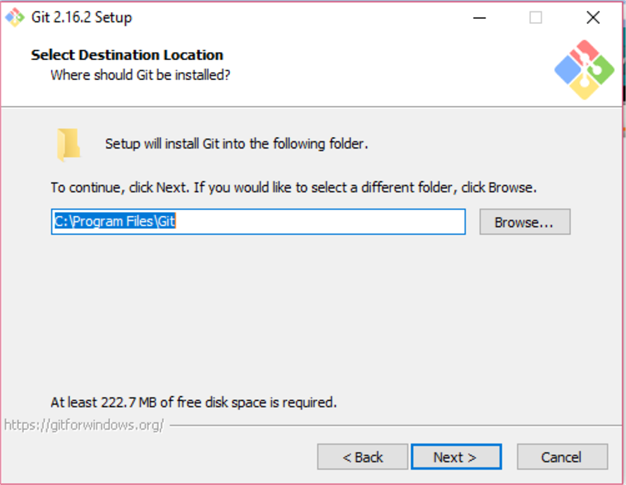
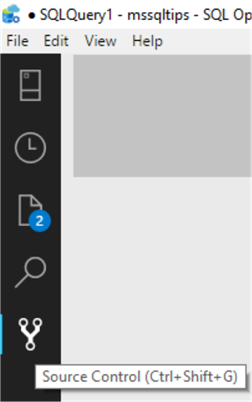
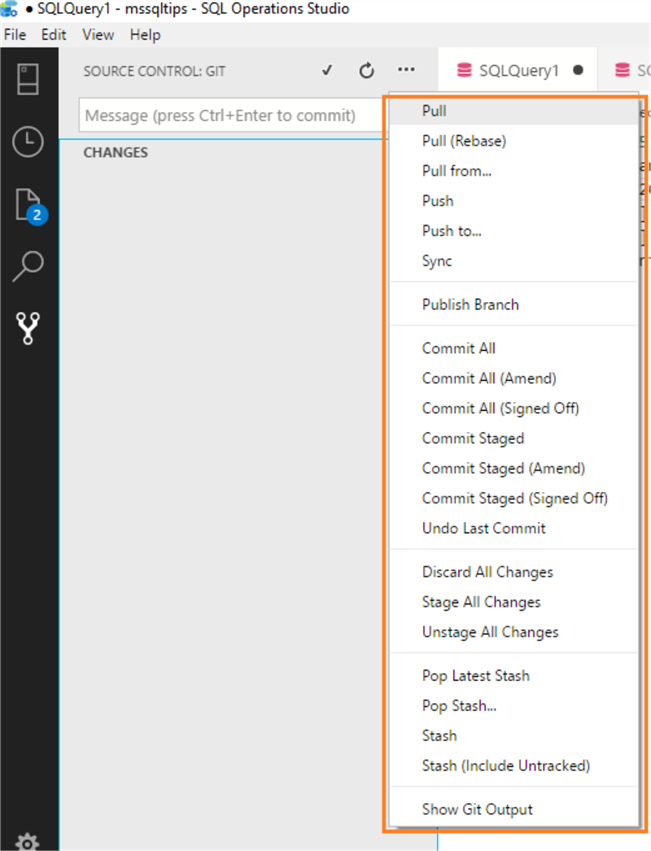
- Source control Git integration
- Integrated terminal bash, PowerShell
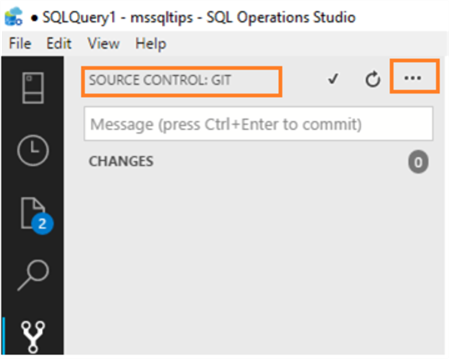
Tasks in SQL Operations Studio
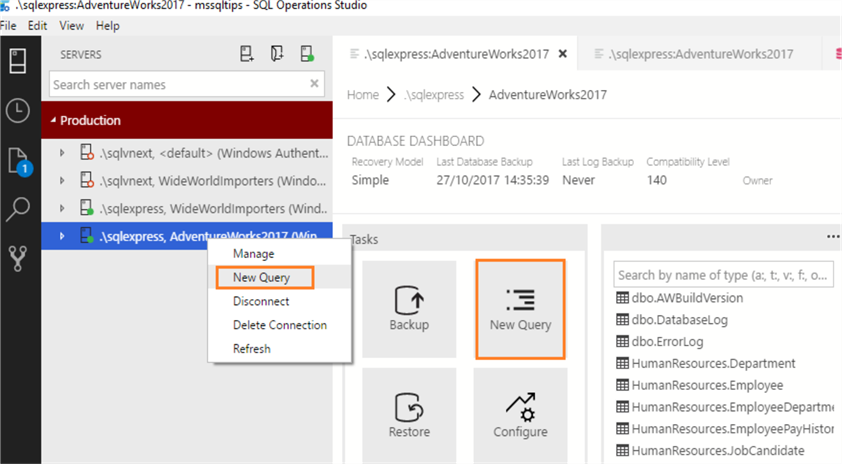
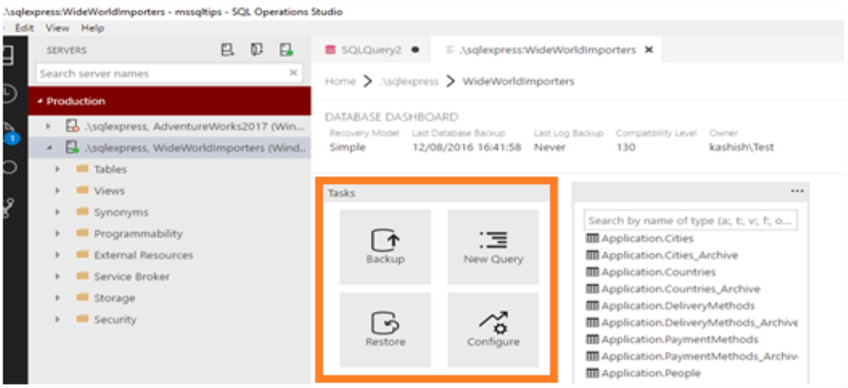
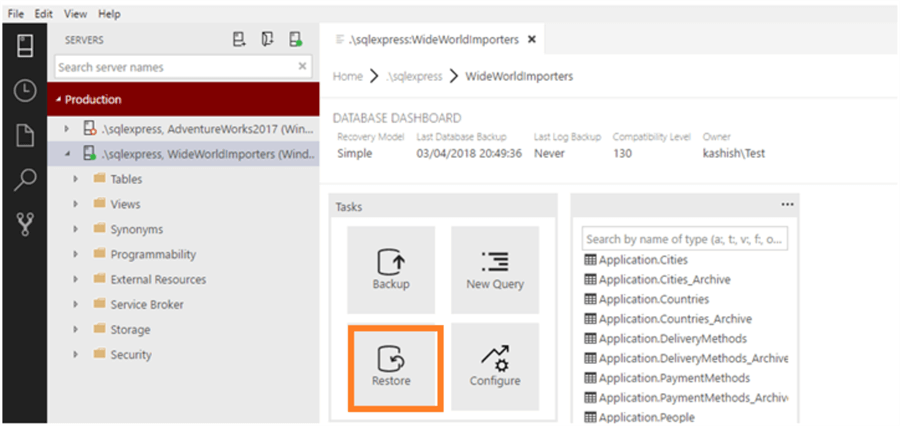
Once we connect to the database instance, right-click on the instance name and click Manage.
This opens up the Tasks window, which has these options (highlighted in yellow square below):
- Backup
- New Query
- Restore
- Configure
We explored New Query and Configure in my previous tips, let's explore the Backup and Restore tasks.
SQL Server Database Backup Options Using SQL Operations Studio
As a starting point, as you probably already know about different backup types in SQL Server, such as these:
- Full Backup
- Differential backup
- Log Backup
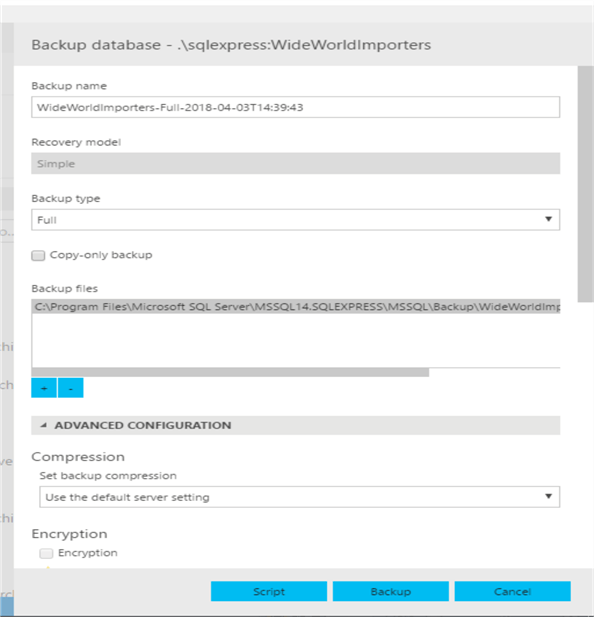
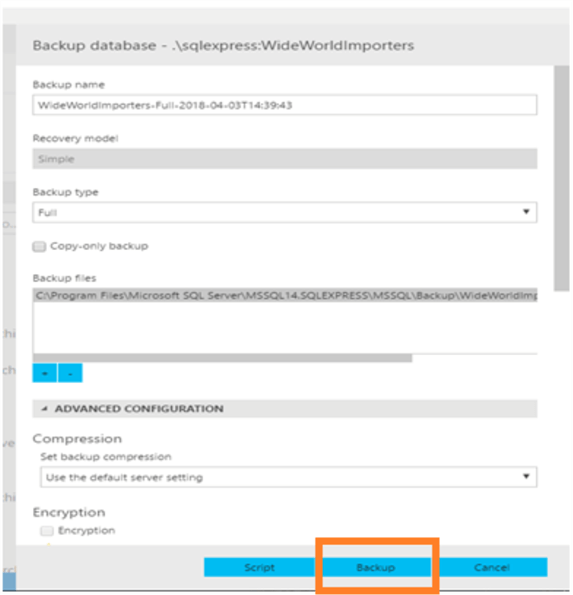
To execute a backup using SQL Operations Studio, click on the Backup task. This opens up the below window to set up a backup.
We can see are these options:
- Backup name: the default format is DBName-BackupType-BackupRunDate
- Recovery model: this shows the recovery model of the database for which we want to take the backup.
- Backup type: This shows the available database backup options for the database. For example, in Simple recovery model, only Full and Differential backups are available, so it only shows these 2 backup options.
- Copy-only backup: If we want to take a copy-only backup, tick this option to execute a copy-only backup.
- Backup files: It shows the backup location as the default backup directory. If we want to change it, click the "-" icon below to remove this backup location and then the "+" icon to add the file into the desired location.
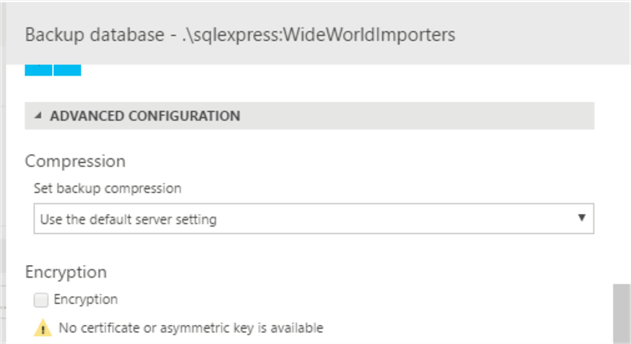
There are some advanced configuration options available, which are shown below:
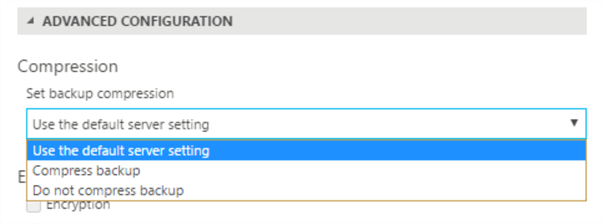
- Compression: By default, compression is set to use the default server setting. If required, we can change it to compress the backup or not compress the backup.
- Encryption: If Certificates are available for encryption, this encryption checkbox will be available. In my case, I do not have a certificate or asymmetric key, so this option is disabled.
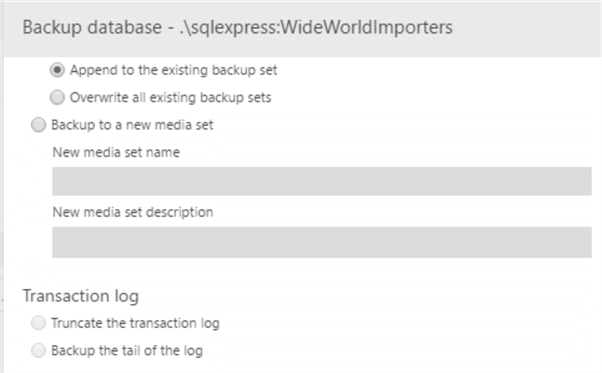
- Media: We can set the option to append backup to existing backup set or to a new media set.
- Transaction log: If the database recovery model is full, we can select an option such as truncate the transaction log or backup the tail of the log.
- Reliability: Under this option, we can select the options to validate the backup set such as:
- Perform checksum before writing to media
- Verify backup when finished
- Continue on error
- Expiration: We can set how long to retain the backup in days. By default, it is set to 0 that means the backups never expire.
Executing Database Backup Using SQL Operations Studio
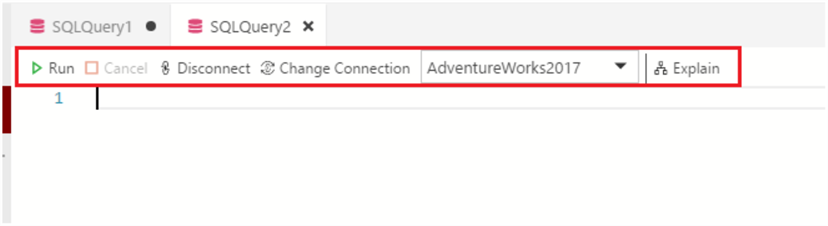
In this demo, I will be taking database backup with the default options. To execute a backup, we have two options:
Backup Database Using Script Option
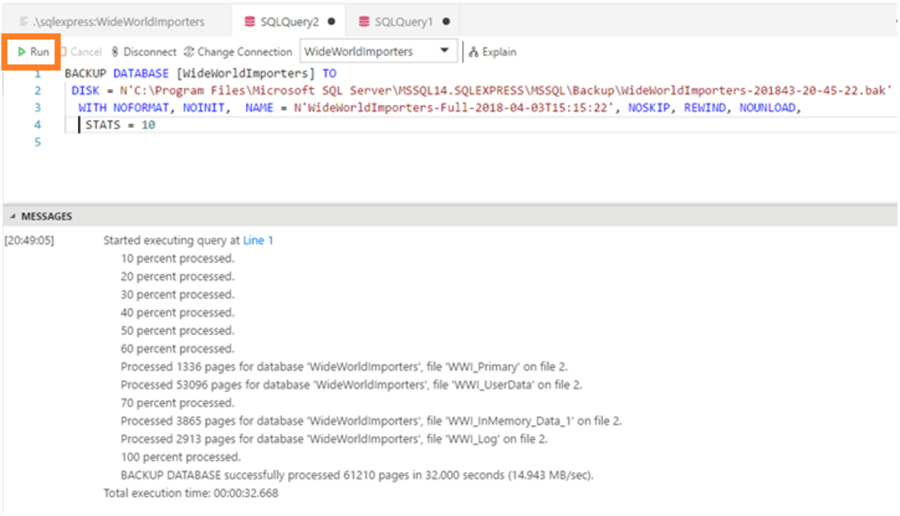
When we click on Script, it generates the backup script in a new query editor. In the Task History, it shows status as Backup Database scripting succeeded.
After it has been scripted, we can click on Run to execute the backup of the script generated.
Backup Database Using Backup Option
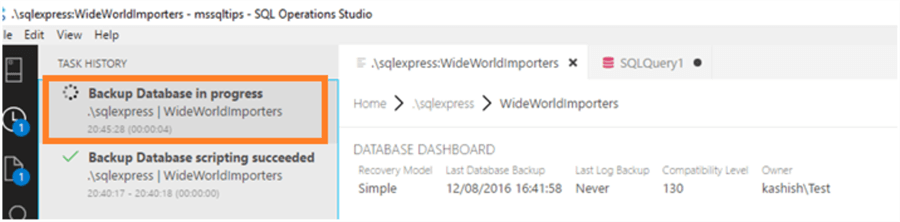
Click on Backup at the bottom, will execute the backup.
Once the backup is in progress, we can see it in the Task History.
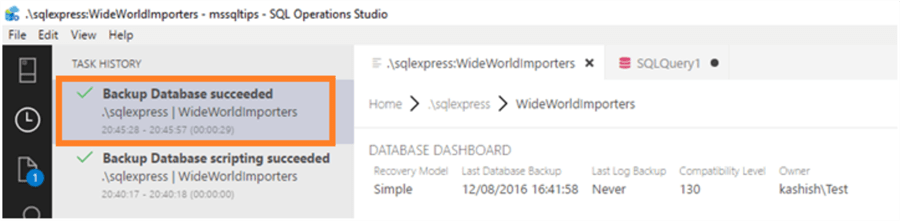
We can see the Backup Database succeeded information is logged in the Task History once the backup has completed.
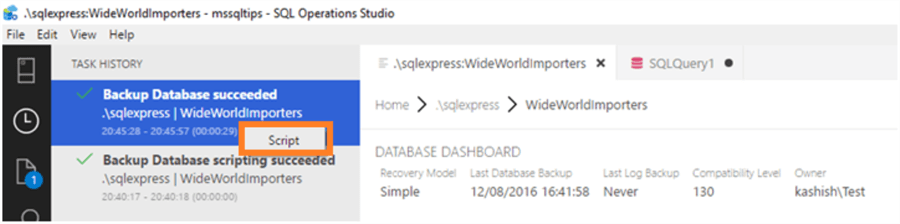
We can also get the script by right clicking on the Backup Database succeeded in Task History as shown below.
We can see the script that backup task used for taking the backup.
Restore a SQL Server Database Using SQL Operations Studio
In the demo, we will restore the database from the backup we just created. The Restore task is in the Tasks section.
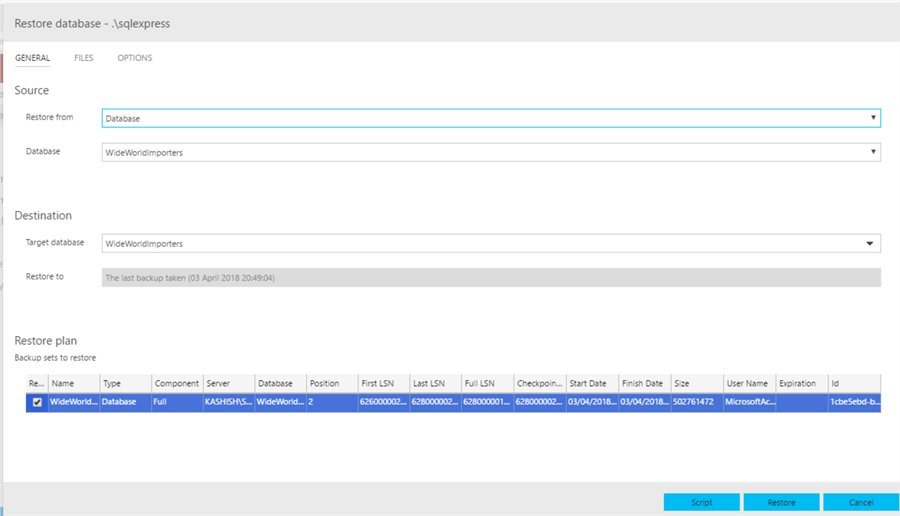
Once we click on Restore, this opens up the restore database window.
Let us go through the restore database details. There are three tabs to configure for a database restore:
- General
- Files
- Options
General Tab
This tab is useful for setting up the source, destination database, restore plan, etc.
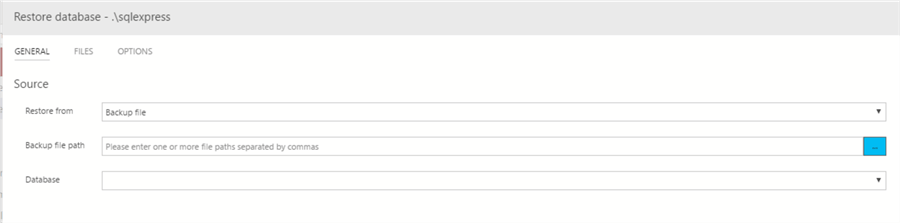
- Source: We can restore the database from the database or from the backup file. If we want to use a backup file, we can select it from the drop-down menu.
If we select the option Backup file, another window opens up for providing the backup file:
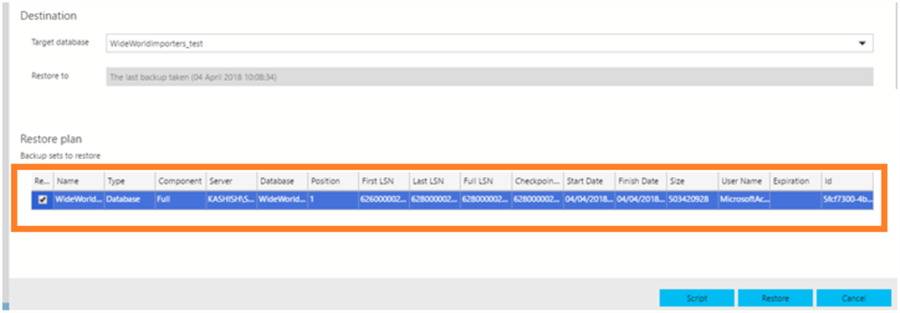
Destination: In this tab, we have to select the destination database. Enter the target database name and it shows the restore date as of the last available database backup. In my case, it shows the last backup was taken "04 April 10:08:34".
It also shows the restore plan along with details of First LSN, Last LSN, Full LSN, CheckPoint, Start date, End date, etc.
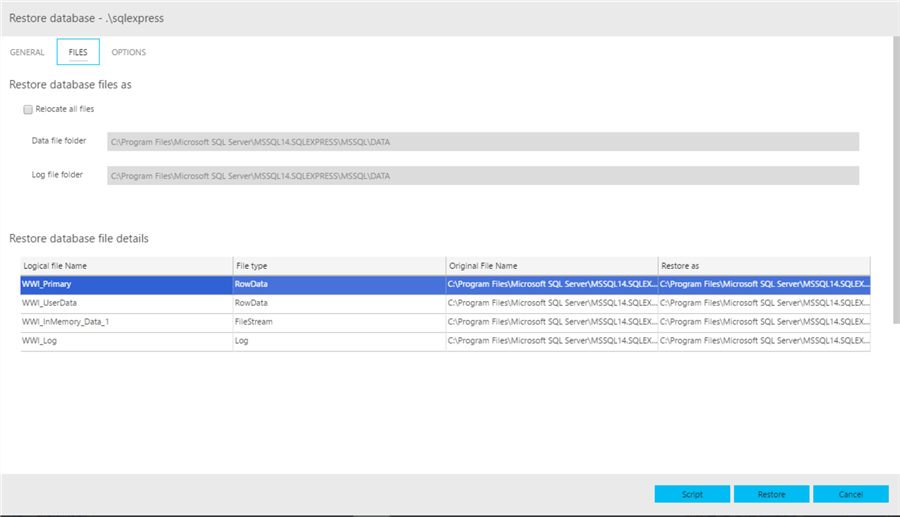
Files Tab
In this tab, we can configure the database files location and can view the restore file location with the file name.
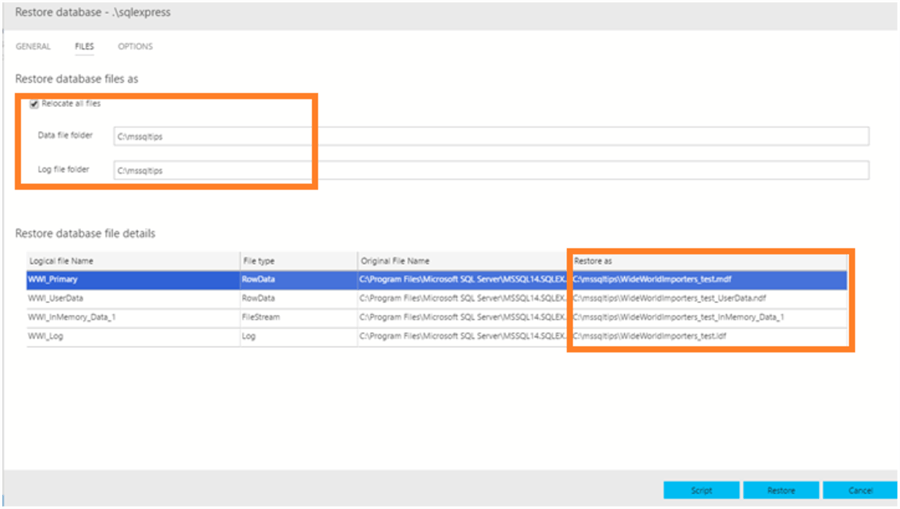
By default, the Relocate all files option is disabled. If we want to move the files from other than the default location, check this option and enter the new location. In this demo, I want to replace all files into the C:\mssqltips folder.
We can see the files location is pointing to the new location mentioned above.
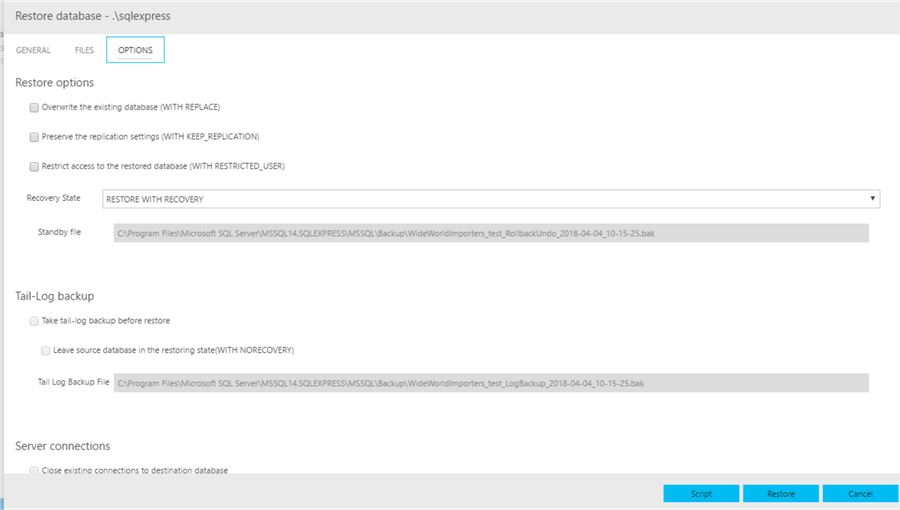
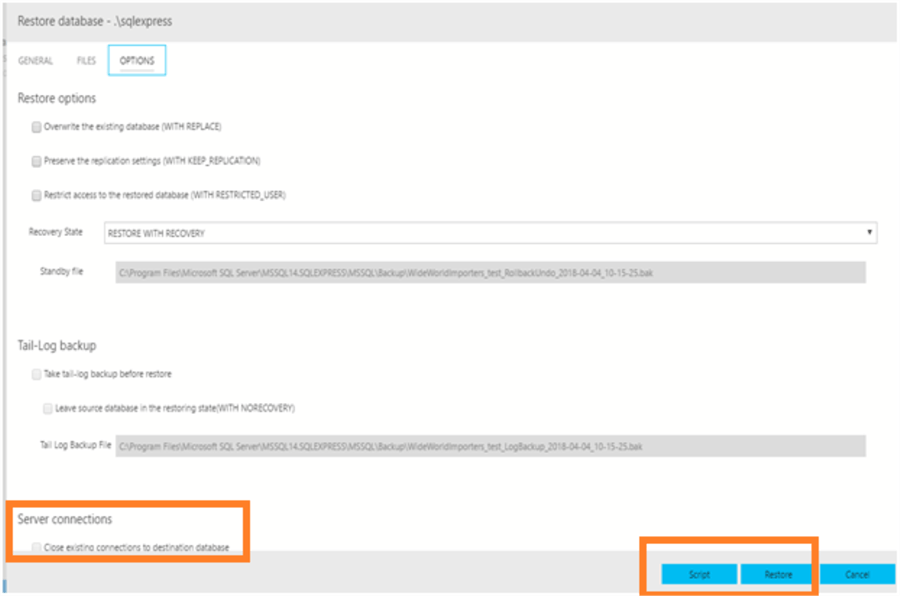
Options Tab
In this tab, we can choose restore options, recovery state, connection state, etc.
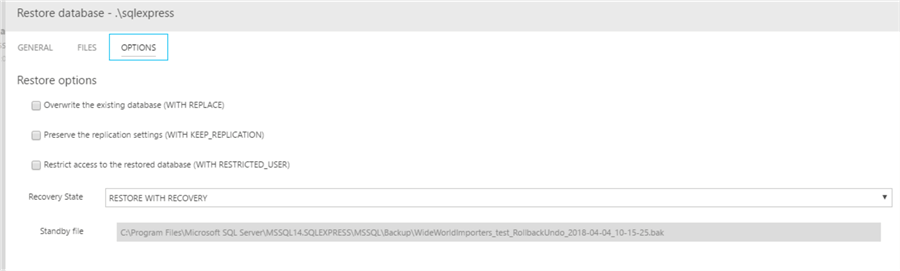
Restore Options:
- If we want to overwrite the existing database, check Overwrite the existing database (WITH REPLACE)
- To preserve replication settings, check Preserve the replication settings (WITH KEEP_REPLICATION)
- If the access to the database needs to be restricted, check Restrict access to the restored database (WITH RESTRICTED_USER)
- Recovery State- we need to specify the state of the database after the restore.
- RESTORE WITH RECOVERY: If we want to perform recovery of the database and make database ONLINE.
- RESTORE WITH NORECOVERY: If we want to apply further restores on this database and do not want the database recovery to be performed, select this option.
- RESTORE WITH STANDBY: If the database needs to be used in standby mode, select this option.
- We also need to specify standby file location as well.
Tail-Log backup:
- If we need to take a tail-log backup before the restore, select this option. We also need to specify the Tail Log Backup Filelocation for taking backup.
Server Connections:
- The last option is to close existing connections to the destination database. Sometimes we face issue when restoring the database because users are still connected to the database. To restore the database, the database should have no users connected. Therefore, by selecting this option, we can close all existing connections and start the database restoration.
Script or Restore:
- Now for running the database restore, we can either generate a Script and execute the script or directly run it after clicking on Restore.
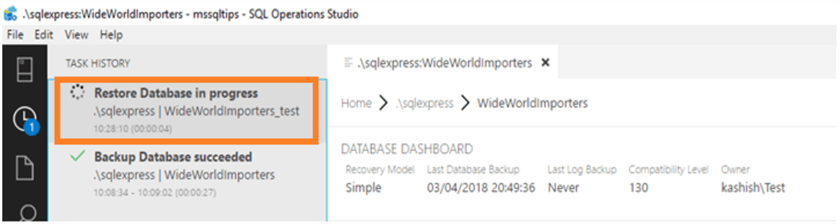
We can see the restore database progress in the Task history.
If we need to cancel the restore, right click on the Restore Database in progress status and click Cancel.
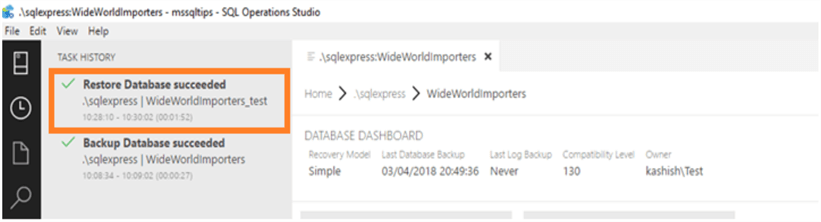
The Restore Database succeeded status is logged in the task history.
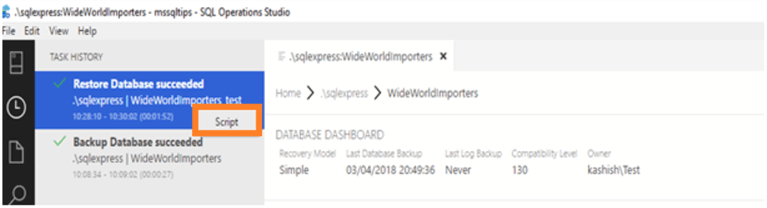
Right click on the Restore Database succeeded message and click on Script.
This generates the script used in the database restore operation.
Next Steps
- Stay tuned for further tips on SQL Operations Studio.
- Read more about New SQL Operations Studio Installation and Overview.
- Read more about SQL Operations Studio - Query Editor and Source Control.
- Read more about SQL Server Backups.